Food photography is so glamourous…
Said no food photographer ever.
Food photography is a blast, but it is a lot more difficult than you might think. The goal of a food photographer is to make food look like a million bucks. This makes sense because we eat with our eyes when scrolling social media. I admittedly will often make recipes I find online based on the photography. After all, which of the following banana breads would you choose?
Banana Bread #1

Banana Bread #2

They are actually both photos taken by me of the same banana bread recipe. Personally, I am picking photo #1. It has way better composition, lighting, and overall interest.
While the food photos posted by your favorite food blogger may look enticing and effortless, I can assure you that hours of work went into that photo. Recipes must be prepped, cooked or baked to perfection, styled, photographed (ideally on a cloudy day with natural light), and edited. If it happens to be on a food blogger page, there is also work writing blog posts, fine-tuning recipes, and creating the blog post itself. Then everything must be shared to social media channels.
In this post, I am going to break down exactly what happens from start to finish in a photo shoot. I am using a loaf of white bread using my great aunt Nina’s recipe and some caramel brownies I shot recently. I hope you enjoy a sneak peek behind-the-scenes (BTS). Contrary to popular belief, most food photographers shoot at home without a fancy studio! As I said before, food photography is fun but not glamourous for most.
Food Photography Tips
Step 1: Select time of day to shoot
Lighting is everything when it comes to food photography. Some food photographers shoot with artificial light, but I currently shoot with natural light. The ideal times for me to shoot from my favorite nook in my home with lots of windows are between the hours of 10:00 am – 3:00 pm. For those who work full-time or have little ones to watch during the day, this can limit time spent photographing food.
I am still trying to find the right balance on managing time with a toddler and accomplishing food photography goals. It really is quite difficult doing all this alone. However, I try to make the most of Mitchy's nap time and weekends. One other major tip for lighting; it is best to shoot with natural light on a cloudy day. Shooting on a sunny day will also work, but photos will have a blueish tint to them that will need to be edited out.
Step 2: Plan the shoot from a food photography standpoint
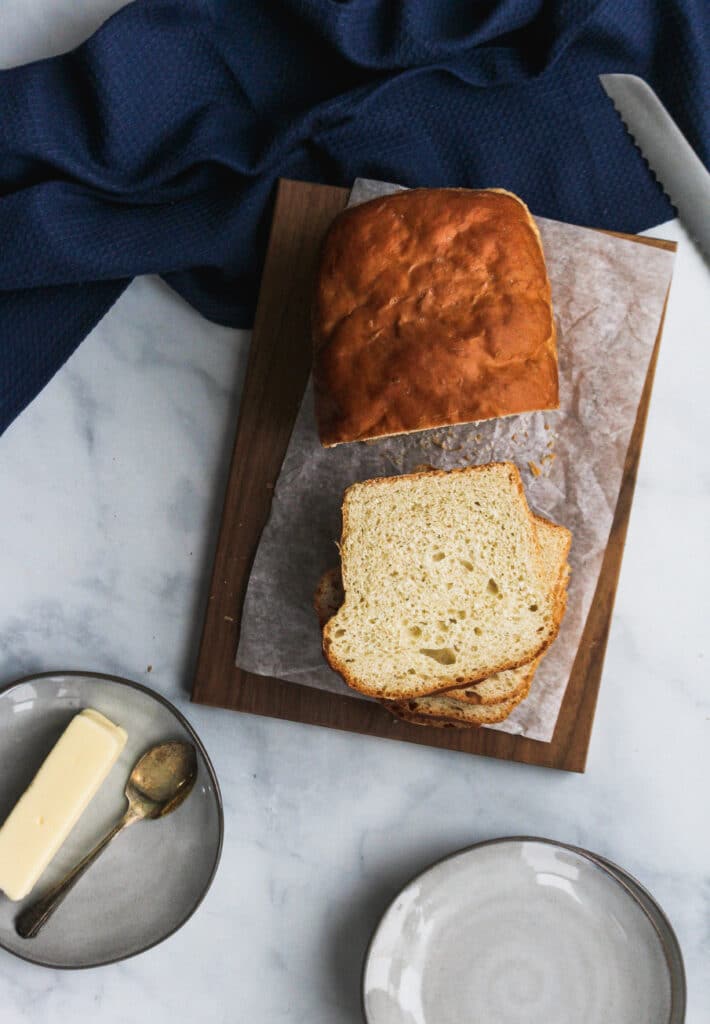
I like to start each photo shoot with a general idea of the types of shots I would like to take, such as overhead, straight-on, and/or 45 degree angle. This really depends on the subject. If you’re shooting a bowl of soup, an overhead is best. If you’re shooting brownies, a straight-on is probably best. I also select which backdrops I am using and props. I could devote an entire blog post to this topic because backdrops and props are so important. Generally speaking, neutral and matte props work best since it keeps the focus on the food. I like to use linens, neutral backdrops, and props that make sense. Here is a photo of some of my props:

For this bread, I used the following:
- “Marble” mat from Ink & Elm
- Textured white backboard that I made
- Cutting board
- Parchment paper to add textural contrast
- Ceramic plates
- Butter
- Antique butter spreader
- Blue towel
Can you spy all of these items?
Step 3: Set up your food scene
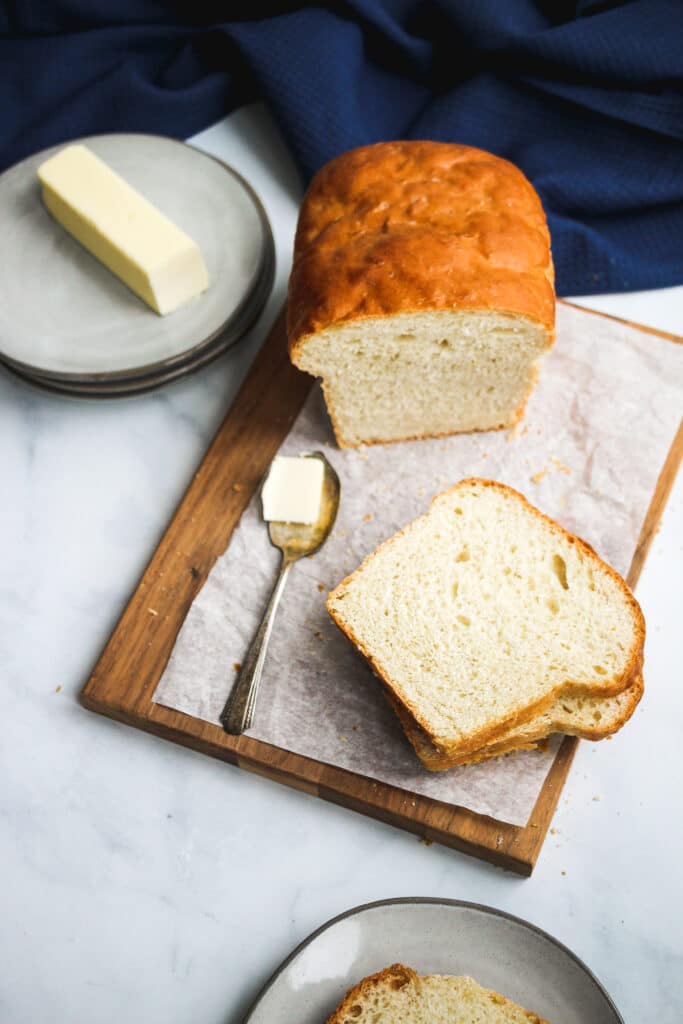
This is where the real fun begins. I am a bit of a minimalist in terms of my set-up and try to make the food the focal point of my shoot. I usually place my props starting with the largest items to the smallest. Even though I start with a vision, I often edit and make revision as I go along based on how things look to me. Food styling is truly an art, and it is something I continue to work on to improve my photos. If I am using an item that is cut, I often move slices or pieces throughout the shoot to capture different looks.
Now, some food photographers use non-edible substances, such as shaving cream in place of whipped cream. I personally shoot true to ingredients, but I have heard of some clever substitutes. One I saw most recently was using a mixture of water with soy sauce to create a cup of “coffee!” I thought it was pretty clever and it certainly looked like coffee.
This was my basic set-up. See? Nothing fancy! The candles are simply to hold the mat down.

Step 4: Start shooting
Once you have your scene set up, start clicking away with a DSLR camera in manual mode. Currently, I use a pretty basic Canon EOS Rebel T5 camera that is about 5 years old. The time has come for an upgrade but I need to land a few paid partnerships before doing so. My stubbornness is a problem at times, but my Canon Rebel gets the job done for now. Never ever shoot in auto because your photos will suffer. Manual mode is so important here because you need to control your ISO, aperture, and shutter speed. It takes time to learn camera settings but this is so necessary. When it comes to choosing a lens, my personal favorite is my 35mm macro lens, but 50mm lenses are also a great choice in food photography.
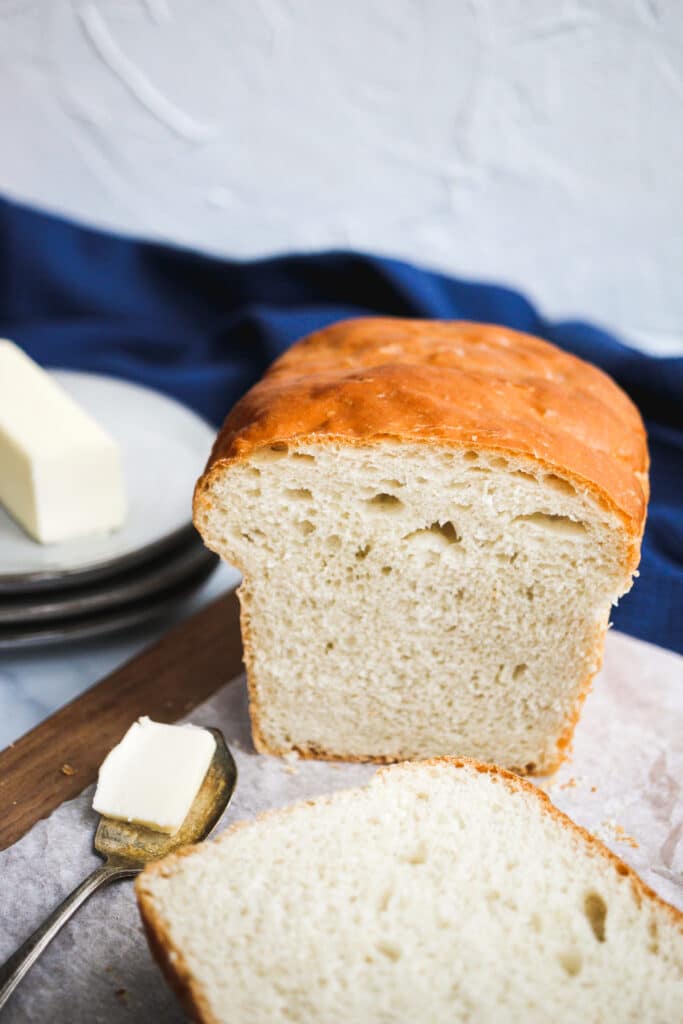
Could you use a camera phone? Certainly, but your quality will suffer and a DSLR is really needed for long-term food photography. The first photo is taken with my DSLR; the second with my iPhone 11. These speak for themselves:
DLSR Food Photography

iPhone Food Photography

I tend to shoot more photos than necessary, but I like to have options. For this bread photoshoot, I shot 53 photos. Many food photographers shoot exclusively with a tripod. I admittedly often shoot without a tripod because I am fairly steady and find it easier to take photos quickly since I am often short on time. It is a goal of mine to start shooting with my tripod more often moving forward.
Step 5: Final look through
Before I clean up my photoshoot, I do a quick look through my photos on my camera. Sometimes, I catch a photo that I like but see a way to improve it. There is also a way to tether your camera to your computer to view them immediately on a larger screen, but I have yet to try it. It seems like it would be very helpful since the small camera screen doesn’t always show imperfections with focus or other issues. The nice thing is if you do notice a minor error, photo editing allows for some improvements. However, you should always try to aim for a well-composed photo and let editing enhance your photo, not fix it.
That’s all for now! I hope you found this interesting! If you have any suggestions for more BTS, send me an email at run2thetable@gmail.com or send me a DM on Instagram @runtothetable.
Leave a Reply